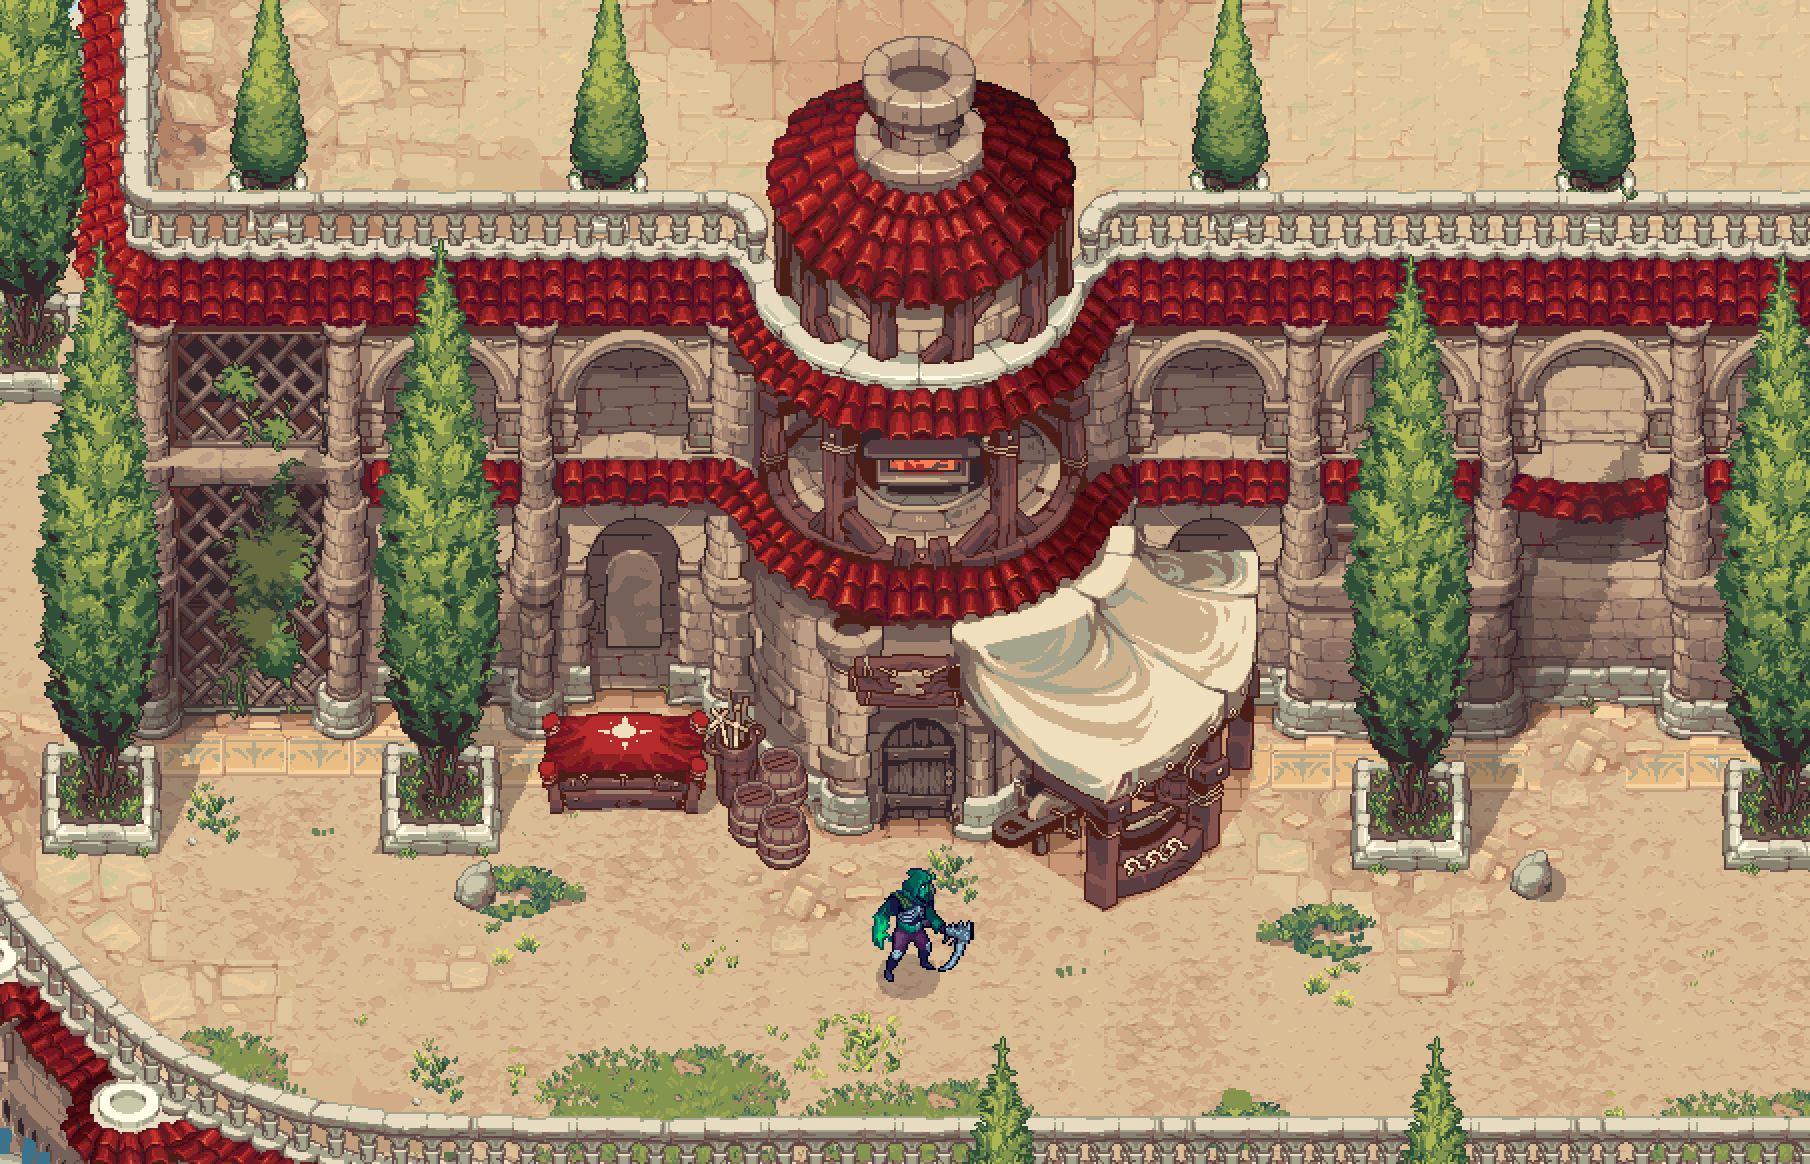
Isometric visuals can deliver a sense of depth to a space without the cost of full 3D. But that illusion only works when assets are consistent, readable, and built for production. That’s where a well-structured sprite sheet becomes critical.
An isometric sprite sheet is a single texture that contains multiple frames of either pre-rendered or hand-drawn assets arranged in a structured layout, like a grid. These frames represent different animation states, directions, or variations of an object viewed in isometric perspective.
In this guide, we break down how an isometric sprite sheet works, how to build one from scratch, and how to integrate it into a real pipeline without falling into common traps that slow teams down later.
What Is an Isometric Sprite Sheet
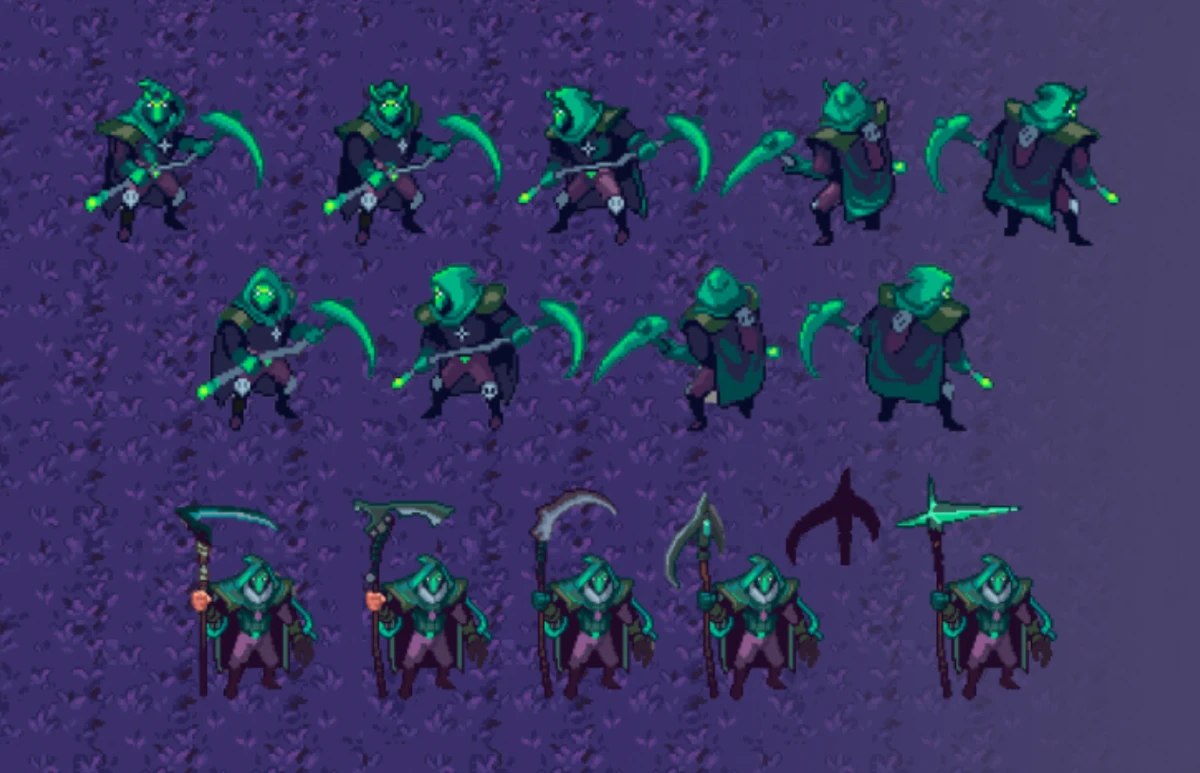
Character views and weapon variations for The Unliving by RocketBrush Studio. The sheet shows poses and design variants rather than a uniform grid of animation frames.
A sprite sheet contains many smaller images called frames, arranged in a grid. Because of that, instead of loading dozens of separate files in real time, the game engine loads one texture and displays a different rectangle of it each frame. Depending on the specifics, that can reduce draw calls and memory overhead, and keeps animation timing predictable. That’s why sprite sheets are a popular choice for game developers.
An isometric sprite sheet applies this idea to art drawn in isometric projection: a viewing angle where the horizontal axes recede diagonally, so you see the top and two sides of every object at once. Each cell of the sheet holds one frame of a character, prop, or tile, drawn from that fixed camera angle.
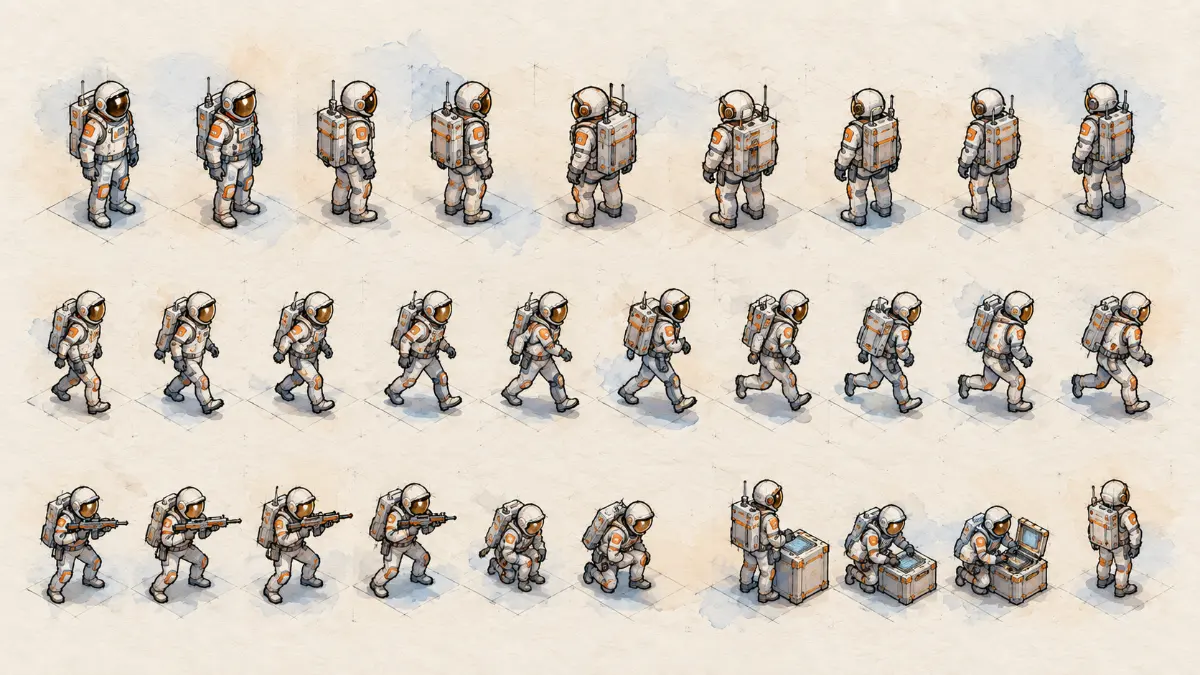
For isometric character sprites, the sheet typically includes multiple directional animations (e.g., walking in 8 directions), each broken into frames.
“Most "isometric" games use a slight variation called dimetric projection, where tiles are twice as wide as they are tall (a 2:1 ratio). In true isometric projection, however, the axes are at 30° to the horizontal. In 2:1 pixel art the angle is about 26.57°, which produces cleaner, jaggy-free lines on a pixel grid. Most artists use the words interchangeably.” — Artist at RocketBrush
Learn more about sprites and how they are commonly used in game development from our article:
[[ref:sprites-in-game-design]]
Isometric vs. Regular (Top-Down / Side-View) Sprites: Key Differences
Isometric sheets are different from regular top-down or side-view sprites, and the difference isn’t just visual. It plays a part in asset production, animation logic, and even memory usage.
Aspect
Isometric
Top-Down
Side-View
Perspective
Angled (pseudo-3D)
Flat overhead
Profile
Depth illusion
Strong
Minimal
Moderate
Directional complexity
High (6–8 angles)
Medium (4–8)
Low (2)
Animation workload
Higher
Medium
Lower
Environment design
Tile-based depth
Grid-based
Layered
With isometric sprites, each angle must feel consistent with the implied 3D space. That means:
Lighting direction must stay fixed
Character proportions must not “rotate incorrectly”
Tiles must align perfectly on the isometric grid
Compared to standard 2D, an isometric character sprite requires more planning upfront, but pays off in visual richness.
Why Use Isometric Sprite Sheets in Game Development
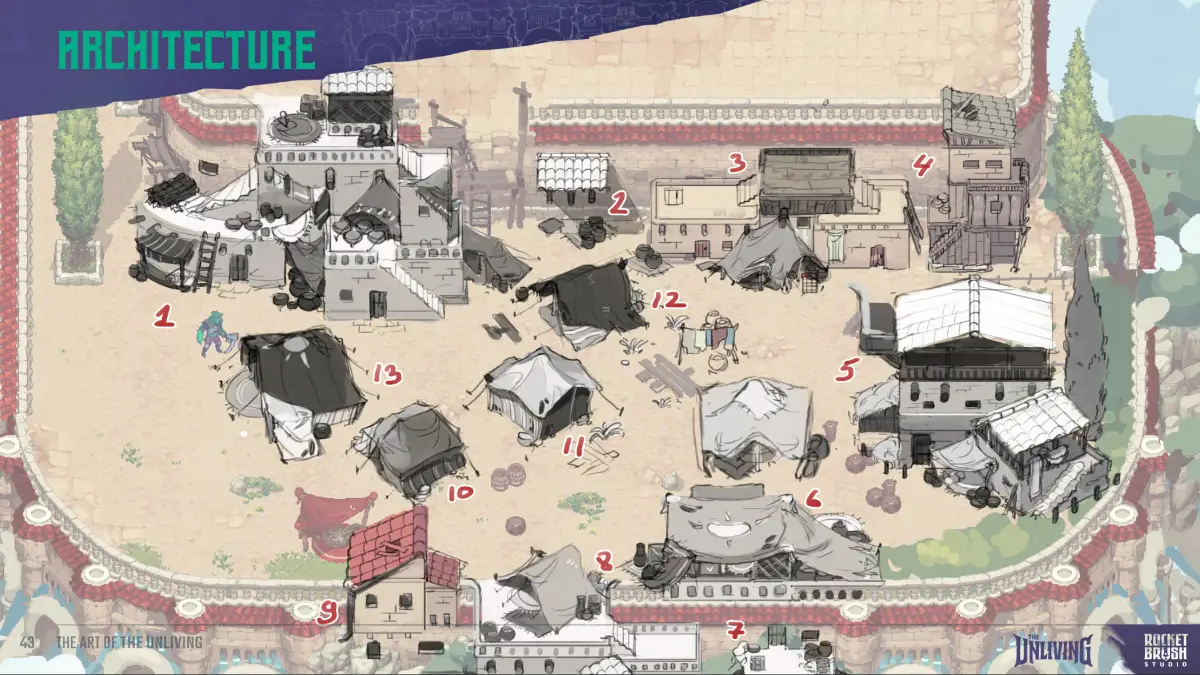
An example of an early concept for a fixed angle view in a 2D isometric game.
There’s a reason isometric games remain popular across indie, mobile, and even AA titles. The format has stayed popular for decades because it solves real production problems.
A 3D feel without a 3D pipeline. Isometric sprites add depth, verticality, and a strong sense of place without modeling, rigging, or having to use performance-heavy real-time lighting.
Performance. A pre-drawn frame is cheap to render and efficient. That matters for mobile, web, and handheld targets.
Art direction control. Every frame is authored, so the artist decides exactly how a cape bends or a sword glints. Nothing needs to depend on a shader.
Readability for tactical and management games. Isometric views let players see units, terrain height, and positioning at a glance, which suits strategy, RPG, city-builder, and tycoon genres.
Fit for small teams. Indie studios can produce a distinctive look with a modest team, because a well-planned asset library gets reused across levels.
Nostalgia with modern polish. The style reads as classic and deliberate, and it pairs well with pixel art or hand-painted rendering.
Isometric sprites might present many advantages but there’s a downside as well. The main cost is upfront planning: because every asset must line up on the same projection, decisions about tile size and directions must be locked before production, not during it.
[[cta:Need isometric sprites?:Tell us about your game. We create isometric characters, environments and animations to match your style.]]
How to Create an Isometric Sprite Sheet
A sketch of different poses for the same character considering isometric angles.
Creating a production-ready sheet is less about drawing and more about structure. Each next stage builds upon the previous one, so It’s especially important to make sure the foundation is well thought through. Issues often happen when teams skip setup and jump straight into rendering. The process breaks into three stages listed below.
1. Setting Up the Isometric Grid
The first part revolves around setting up the grid. Every following stage depends on that:
Defining tile size as a production standard. Agree on a base unit early (e.g., 64×32 or 128×64 for a 2:1 isometric grid). This determines how assets snap in-engine, how modular your environment is, and how easily new content can be added later. Smaller tiles support retro or pixel-heavy styles; larger tiles allow more rendering detail but increase texture cost.
Standardizing character frame dimensions. Characters often extend beyond the height of an isometric ground tile, so define a separate frame canvas that accommodates the full character silhouette (e.g., 64×96 or 128×128 pixels). Ideally, maintain identical canvas dimensions across all frames and animations, keeping the character's ground contact point and pivot consistent. This simplifies sprite sheet slicing, animation alignment, and engine integration.
Locking directional scope upfront. Direction count directly affects budget and timelines. 4 directions is commonly used in mobile/indie games, 8 directions is standard for mid-scope projects, 16 directions is a niche choice that is significantly more expensive. For external teams, this must be defined before production starts as changing it later multiplies workload.
Setting pivot points as a technical requirement. Define a consistent anchor (typically bottom-center for characters, base contact for props). Misaligned pivots lead to sliding, jitter, and extra engineering time.
Providing a shared guide/template file. A locked grid layer or sprite template should be part of the handoff package. It acts as a single source of truth for all contributors. This is a simple way to enforce consistency without micromanaging execution.
In practice, these decisions define whether your sprite sheet integrates cleanly on first import or turns into a round of fixes and delays.
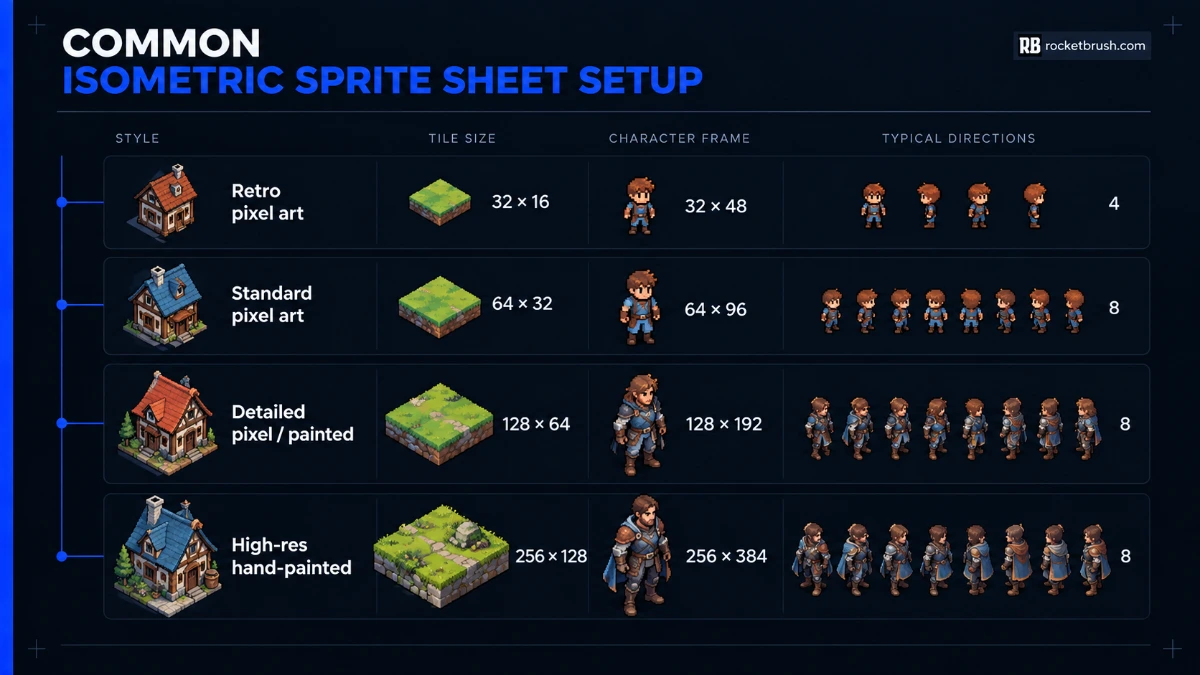
Here is a quick reference for common setups, that will help you understand the grid better during development or while working with an outsourcing studio:
An overview of the most commonly used sprite sheet setups: tile size, character frames, and directions.
2. Sketching and Detailing the Sprites
Once the grid and specs are locked, production should follow a tight, repeatable loop. For outsourcing, this structure is what keeps output consistent across teams and batches.
Blocking silhouettes at game scale. First, simple volumes are aligned to the grid. If the isometric character sprite isn’t readable at target size, detail won’t fix it. This is often treated as an early approval checkpoint.
Locking key poses first. The idle set is built in all directions and tested in-engine. This defines proportions, perspective, and spacing for the full sprite sheet.
Standardizing lighting and palette. Isometric sprite sheets require fixed light direction and limited colors. These rules should be documented to maintain consistent shading across all sprite sheets, which is especially critical when multiple artists are involved.
Animating in clean loops. Frame counts should be kept production-friendly (e.g., 6–8 for walk, 2–4 for idle). Seamless loops are prioritized over complexity to reduce integration overhead.
Mirroring selectively. Reusing frames makes sense only when designs are symmetrical. Asymmetry (gear, stance) requires unique directions — this has to be defined upfront for the isometric character sprites set.
Finalizing with a technical QA pass. Cleaning artifacts, smoothing edges, and verifying pivot consistency happen at this stage. This step prevents engine-side fixes and rework.
3. Assembling and Exporting the Sheet
Once frames are complete, they must be arranged for predictable engine parsing. In outsourced pipelines, this step often determines how smoothly assets integrate into production.
Defining a clear layout convention. Common setups use one row per direction and one column per frame. The exact structure is less important than consistent documentation across the sprite sheet pipeline.
Keeping uniform frame sizes. Fixed cell dimensions ensure clean slicing in Unity or Unreal. If trimming or packing is used, export metadata (JSON/XML) to preserve offsets.
Using engine-friendly texture sizes. Power-of-two dimensions (512, 1024, 2048) remain the safest choice for game sprite sheets, especially in multi-platform builds.
Adding padding between frames. Depending on the engine settings,1–2 pixels or edge extrusion can prevent texture bleeding in isometric sprites during filtering or scaling.
Exporting clean formats and preserving sources. Use PNG for final output and retain layered files (PSD/ASE/KRA) for future edits.
Matching filtering to art style. Pixel art uses nearest-neighbor filtering; painted styles may use linear filtering depending on visual intent.
Finally, the sprite sheet should be imported and tested in-engine early. One full animation loop per direction is enough to catch pivot or slicing issues before full production scales—fixing them at this stage is fast; later it becomes expensive.
Tools and Software for Isometric Sprite Sheets
The right tool depends on the art style and production pipeline, as different applications serve different stages of sprite sheet creation. Drawing and painting tools are used to create and refine 2D sprites, while other tools generate pre-rendered frames for isometric assets. Packing tools handle the final assembly and optimization of sprite sheets for engine integration.
In production, teams often combine tools, taking advantage of what each one has to offer. The most common pipeline includes Blender being used for render base frames, Photoshop used for polish and cleanup, and TexturePacker — for final sprite sheet export. This hybrid approach is common in scalable pipelines.
Why You Need an Isometric Sprite Sheet Template
If you care about consistency, an isometric sprite sheet template is an essential part of the workflow.
A sprite template helps define frame size, alignment rules, padding and spacing, as well as animation layout.
When it comes to characters, an isometric character template ensures consistent proportions across animations, stable pivot points, and provides easier iteration when updating frames.
Templates are especially useful when multiple artists work on the same project, which often happens in outsourcing or whenever the production spans months or years. Without one, small inconsistencies compound quickly.
Common Mistakes to Avoid
Even experienced teams may run into issues but the good news is that most isometric production problems are avoidable. These are the ones that appear most often:
Inconsistent projection. Mixing 2:1 dimetric tiles with true 30° props creates visible seams. Instead, it’s best to choose one angle and enforce it.
Changing light direction. If highlights jump sides between directions, characters look like they're rotating under a spinning lamp. Light sources should remain fixed to avoid this.
Unstable anchor points. Even a one-pixel offset between frames causes jitter. Lock the feet position on every frame.
Too many directions too early. Drawing eight directions for every enemy before the game loop is proven wastes the budget. Instead, it makes sense to start with just four for prototypes.
Ignoring draw order. Isometric sorting depends on depth, not just position on screen. Plan how characters, walls, and props layer in the engine before designing tall assets.
Overly wide or tall sprites. Oversized frames waste texture space and make packing inefficient. Trim unused transparency to achieve efficiency.
Mixing pixel densities. A 64-pixel character standing next to 128-pixel tiles looks like a scaling error, not a style choice. Keep densities aligned to avoid this mistake.
No source files. Flattened PNGs are hard to edit. During production it’s essential to always keep layered originals.
Skipping in-engine tests. A sprite that looks fine in an art program can behave differently once scaled, filtered, and animated in the game. Tests can minimize the risk of issues down the line.
Most of these are pipeline, and not artistic issues. But with careful project management and art direction they won’t affect the process.
Examples of Isometric Sprite Sheets in Games
Isometric visuals appear across multiple genres and serve different purposes. Studying shipped games is one of the fastest ways to understand how these assets are planned.
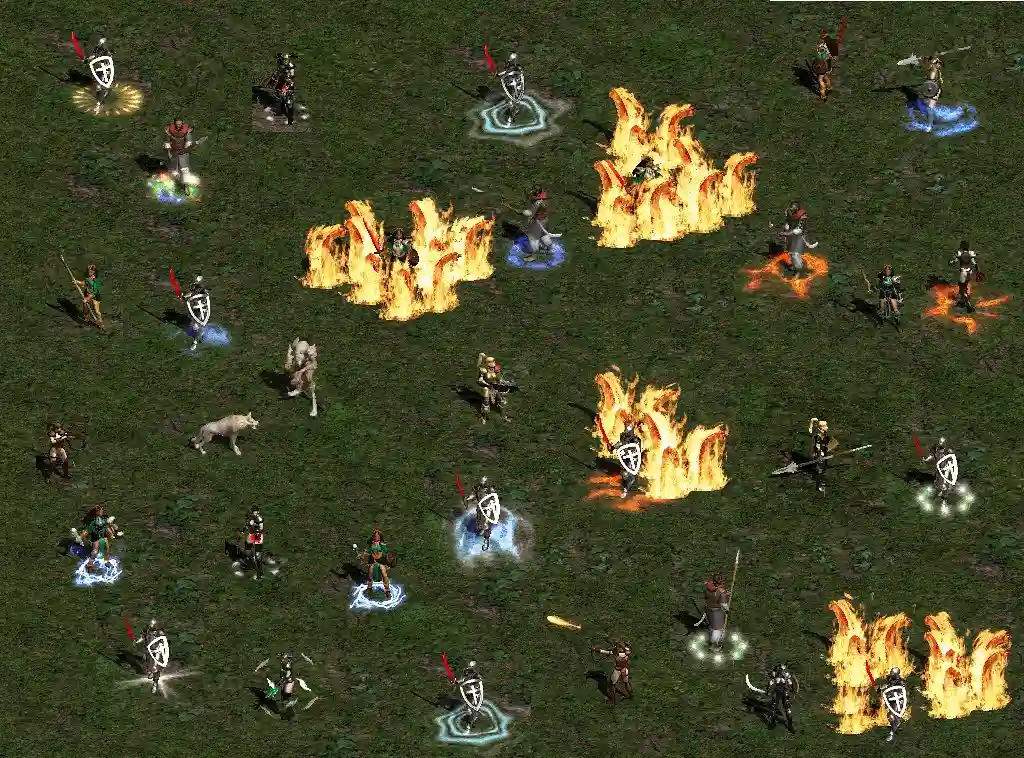
Diablo (1996). The game used pre-rendered 3D models converted into 2D frames across eight directions to create characters and monsters. It is a landmark example of the 3D-to-sprite pipeline that allows to create the illusion of volume and depth in a game with a top-down camera angle.
Sprites used in Diablo II look detailed and three-dimensional, thanks to the creation process.
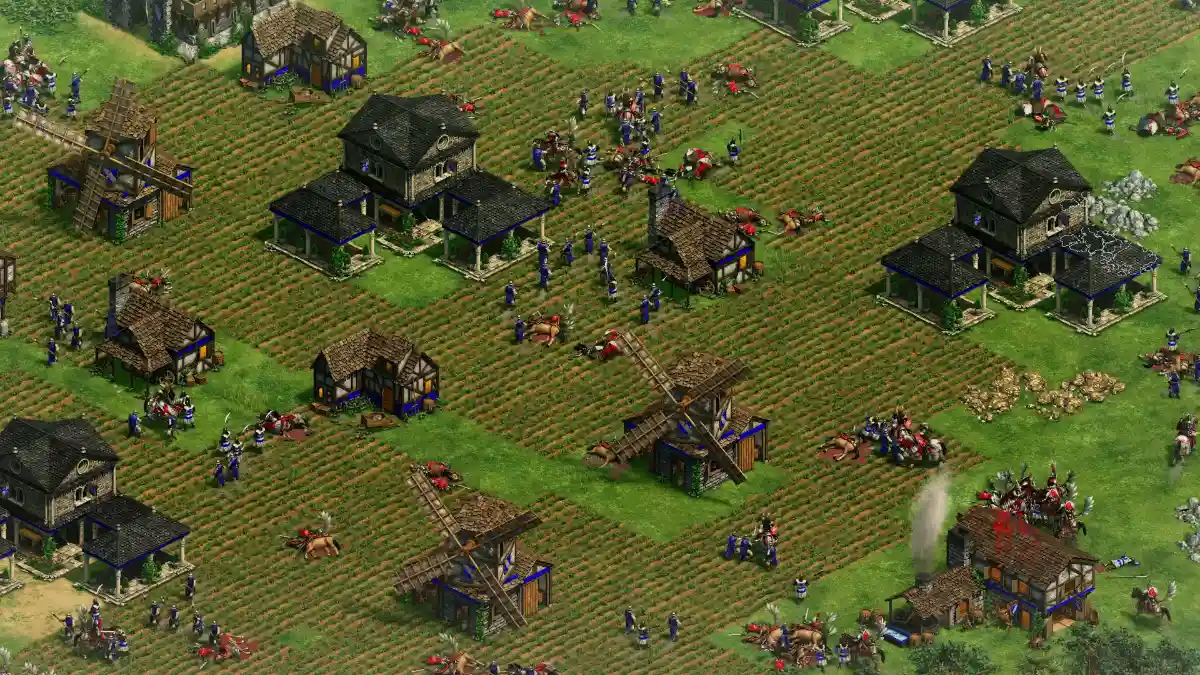
Age of Empires II. For this game, units were drawn or rendered in eight directions, and the sprites were designed to stay readable at very small sizes, which is a good lesson for strategy games. The most recognizable feature of units is color (blue for player’s and red for the opponent’s) and it serves as the main anchor.
A screenshot from Age of Empires II with readable units and buildings.
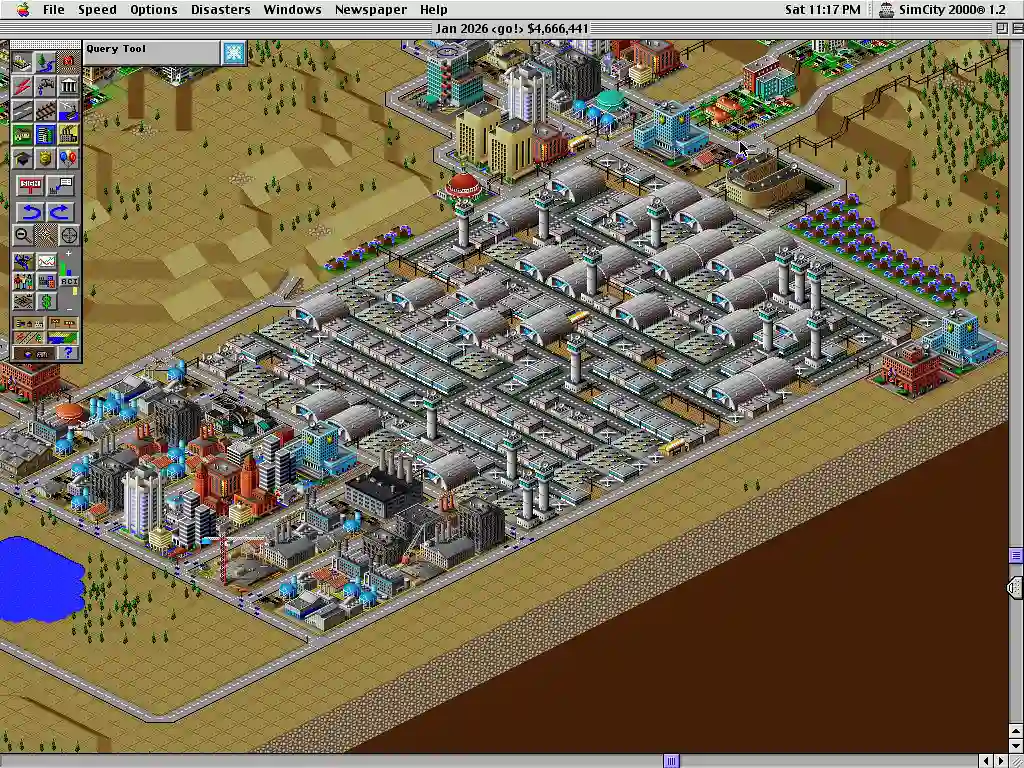
SimCity 2000 and RollerCoaster Tycoon. Both games represent building simulators. They rely on huge libraries of tiles and objects that snap into a shared grid. They show how consistent tile geometry lets thousands of assets combine cleanly to create an illusion of depth even with limited camera angles.
Sim City 2000 is a city builder simulator, so architectural consistency is important.
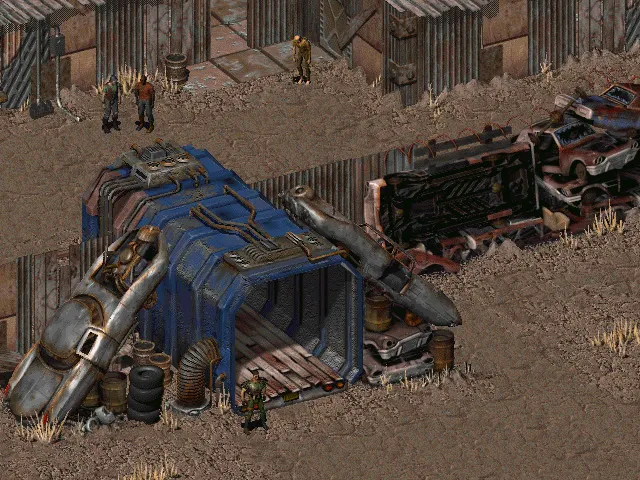
Fallout (1997) and Fallout 2. For both these games, developers used isometric art on a hex-based grid. This serves as a reminder that isometric visuals don't require a square tile system.
Fallout is a more advanced example of what can be achieved with sprites.
Across these examples, each team had to choose a projection early, fix a direction count, and build the entire library around it. That planning is what makes a game's world feel cohesive.
FAQ
What is an isometric sprite sheet?
An isometric sprite sheet is a texture containing multiple frames of assets drawn in isometric perspective, used for animation or variation in games.
What's the difference between isometric and regular 2D sprites?
Isometric sprites simulate 3D depth using angled perspective, while regular 2D sprites (top-down or side-view) use flat projections with simpler directional requirements.
What software is best for making isometric sprites?
It depends on style. Aseprite is best for pixel art. Photoshop or Clip Studio — for painted assets, and Blender is good for pre-rendered sprites Most production pipelines combine multiple tools.
Can I use a ready-made template for isometric character sprites?
Yes. A sprite template or isometric character template helps maintain consistency, especially across animations and multiple artists.
How many angles do I need for an isometric character sprite sheet?
Typically 6–8 directions for smooth movement. Some projects reduce this to 4 for performance or stylistic reasons, but that affects visual fidelity.
Why Choose RocketBrush for Custom Isometric Sprite Sheets
Building an isometric sprite sheet is as much an art task as it is a production one. At RocketBrush, the focus is on turning style into a repeatable pipeline:
Grid-first approach — every asset aligns with engine requirements from day one
Style-to-production translation — concept art is converted into clear rules for shading, proportions, and animation
Internal validation — assets are tested before delivery to avoid integration issues
Scalable output — from a single isometric character sprite sheet to full environments
Instead of delivering isolated assets, the goal is to build a system that holds up across updates, live ops, and content expansion.
Create with us
Contact us, and we'll craft the perfect game art for your project